Weasley Clock
" Promise me you'll look after yourself... Stay out of trouble... "- Molly Weasley
How it all started - May 2017
I once found a "behind the scenes" book at my local book store showing every prop, costume und character of the Harry Potter universe and I was hyped when I saw that magical Weasley clock everybody knows from the second movie when Harry entered the weasleys mansion for the first time.
the corpus
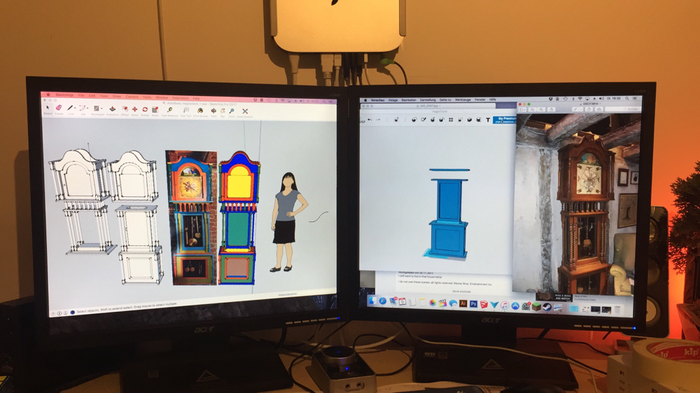
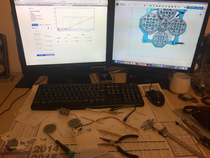
The first thing I did was to create a sketch in Autodesk 123d Design. In my opinion it is easier to work with a 3d model than measuring each part and take a bunch of notes.
I was able to convert the basic measures from pictures. The rest was type&click.
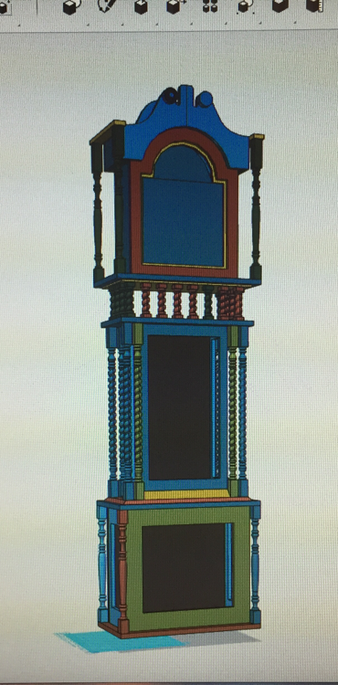
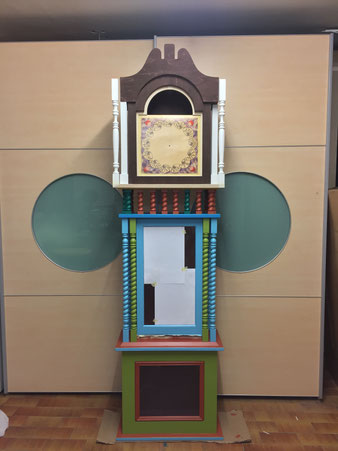
Most of the parts are very close to the original. The height of the whole clock is exactly 2 meters.
The clock will be build in three pieces. So it can be disassembled for transportation.
As you can see, there are windows in the two lower pieces which will show the inner clockworks later. I used plexiglass instead of real glass.
Every pillar you can see will be 3d printed with my Lulzbot Mini 3d printer. I already started with some of them and it will take over 100 hours to get them all done...
I will try to get a nice paint job with colors close to the original. Although I want to achieve a more rustic style instead of a childish one.
the Clockwork
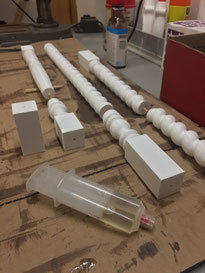
Building the clockwork was one of the most difficult parts of the whole project. Instead of a normal clock, which has two pointers, the Weasley clock has one pointer for each family member. So there are several driving rods which have to be combined.
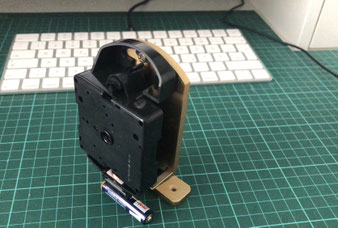
I came up with my own idea which contains some stepper motors and lego technic gears.
It is basically 5 tubes shoved together, forming the center rod and the motors positioned on different heights to move the gears for each rod.


With the help of my lulzbot mini 3d printer it just took a couple of hours to print out all the pieces to form the clockwork. The clamps on the right hold each motor on the right height.

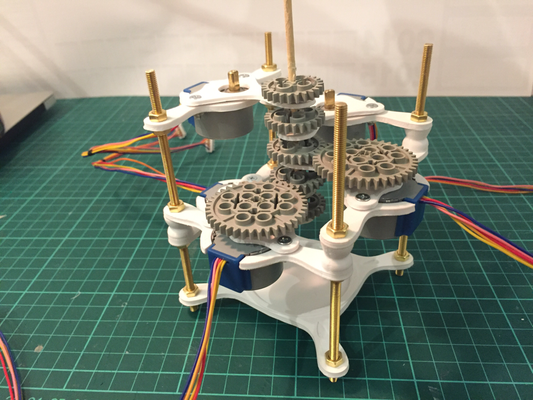

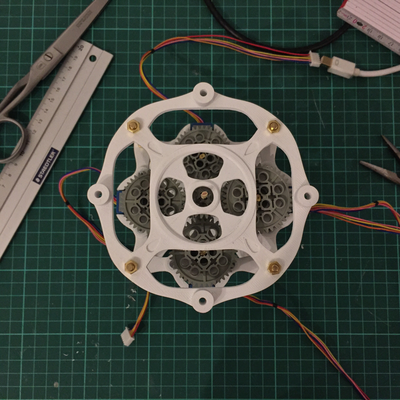
The gallery shows some progress from the first assembly try to the final piece. I used brass nuts and rods to hold everything in place. The top plate has 4 screw holes to connect it to the clockface-plate.
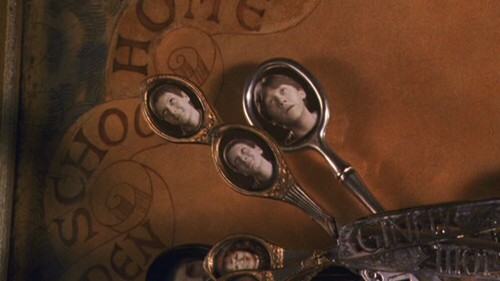
The clocks' hands
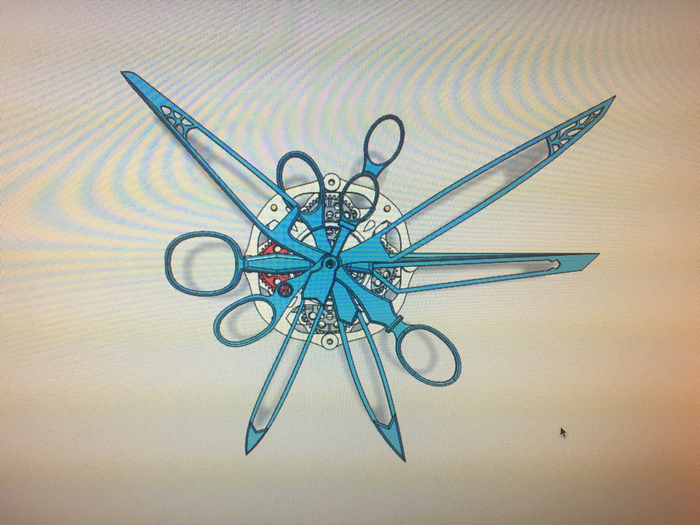
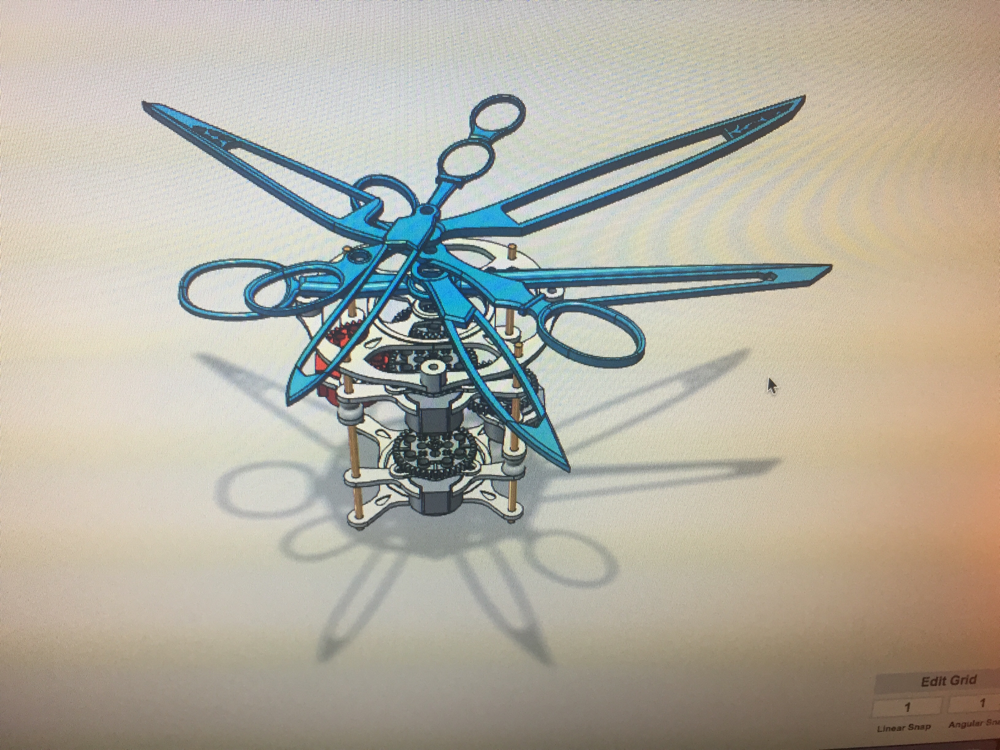
This step shows the designing of the clocks' hands. In the original clock there are 8 different hands for each member of the Weasley family. My motor kit only contained 5 motors, so I decided to only use 5 hands. There also was a problem with spacing inside the clocks case.
I tried to get as close as possible to the original design for the hands. The designs I came up with are the same as Ron, Molly, Fred&George, Arthur and Bill.
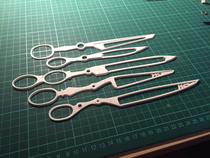
These are the final printouts. They came in two pieces each and had to be glued in the middle. They already had a lot of detail but needed to be primed and sanded.
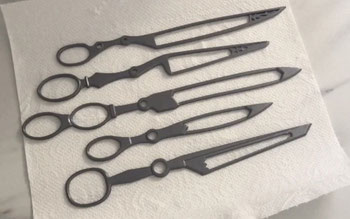
After some layers of primer and additional sanding sessions it was time to at that old rusty metal finish the clock hands have. I used Tamiya spray paints and some old metal paints for weathering.
I went to my local staples store and used their service to print the families portraits and names on transparent foil. After adding some white color on the backside they were ready for assembly.
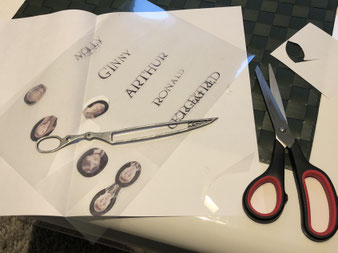
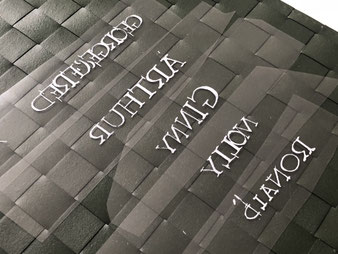

After cutting everything out the Portraits and names were added to their corresponding hands.
I am very very happy with the final design of the clock hands. The weathering effect and portraits came out beautiful and have the same look as in the original clock.
I also added some plastic on the backside of the portraits for more stability. The heads don't move but I guess that's magic I am not able to reconstruct, yet.
Lower Corpus
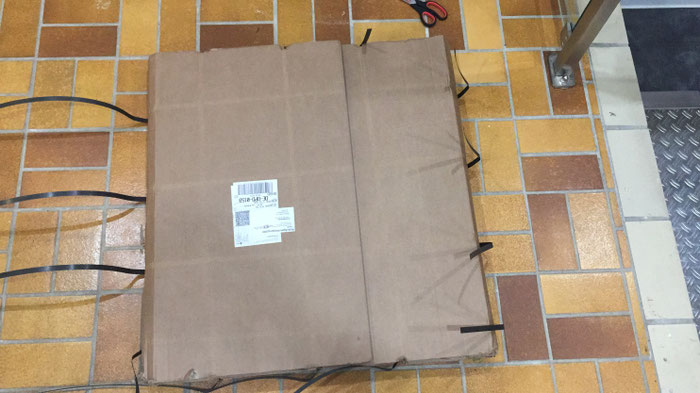
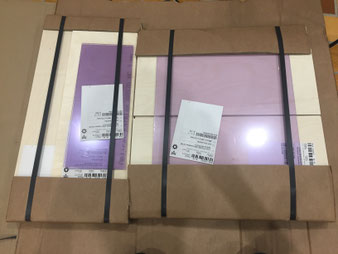
Three packages arrived. Over 40 pieces of wood in total. Also some precut plexiglass which will later be used for the glass elements in the lower corpus.


After figuring out which wooden plank belongs where I tried to form the lower part of the corpus. So I started with the front part which needed a big cutout for the plexiglass.
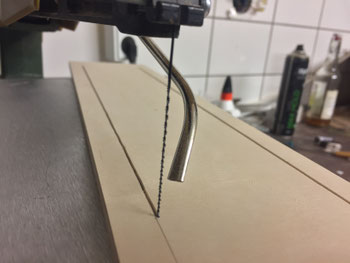
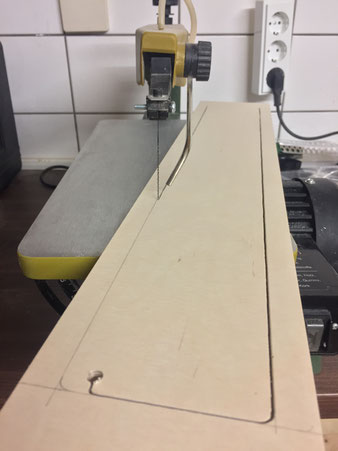
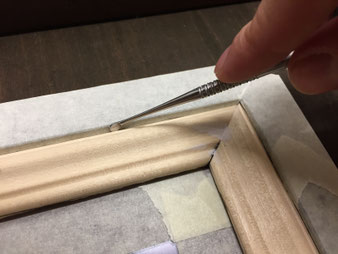
Even more cutouts where made. The picture shows one of the six parts which form the side panels later. I used my scrollsaw for all of the cutouts that were necessary. I did my best to stay as accurate to the line as possible. It did an excellent job on that. The outcome was pretty straight. Only a bit of sanding was done afterwards.
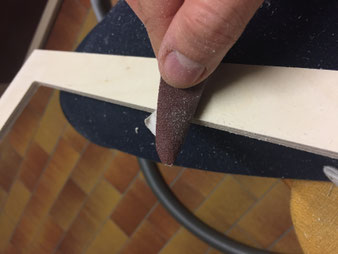
For sanding I used a lot of different grids. Starting off with a 160 grid and finishing with about 600-800 grid. I grinded a little curve on the inside of the frame for a smoother look.
Turned out to look darn good.
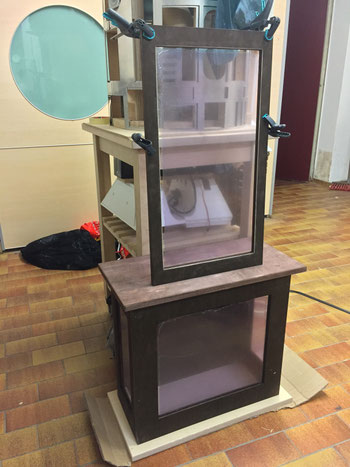
After all parts where cut, grinded and ready to assemble I gave it a first try. Nothing was glued together just layed and fixed with some tape but you get the idea how it will look later.
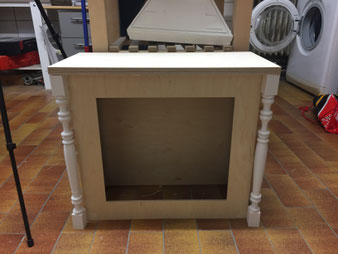
I added some walnut woodsstain to get a darker coloring as in the original. Then I glued the walls.


MIddle Section
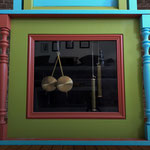
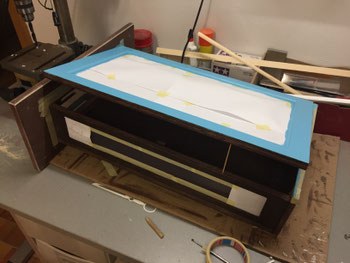
The middle part of the corpus basically works like the lower one. With the exception that there is a door with hinges which will later close and open for the pendulums.
There are three layers of wood which hold the plexiglas. I also added a small wooden line around the window for extra detail.
After adding woodglue to all the parts the clocks corpus begins to form.
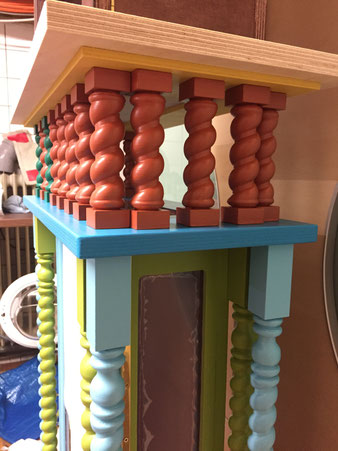
3d Printing the coloums
While woodglue was drying I switched on my 3d printer for the pillars of the clock. There are 16 small, and 16 big ones. So a lot of hours of printing. I first thought of making a mold and cast copies of the first prints. But as soon as a got into it I just run my 3d printer over night.
The small pillars were printed in packs. The big ones need to be split in multiple parts, though. So only one pillar per print was possible. Each print took about 17 hours ...
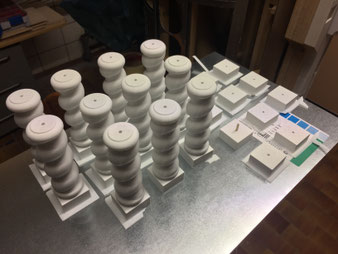

I used epoxy glue to combine all the parts for one pillar. There a some holes in each one to stick them together and give it more strength.
One pillar has 6 parts which took approx. 17 hours to print. So with 16 pillars in total it was a lot of print time.
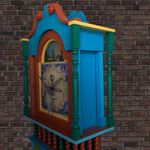
Painting
While more and more pillars were printed I was looking for paint at the local stores. The original clock is very colorful but looks a little bit too childish for all day presentation, so I decided to use warm colors. There are six base colors for the clock: red, dark blue, sky blue, dark green, light green and Yellow. And I found some which fit together perfectly.
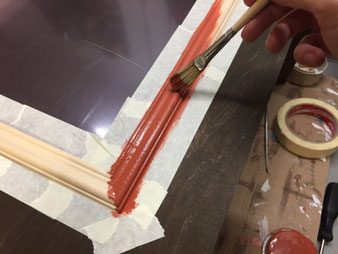
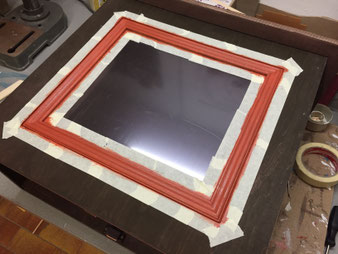
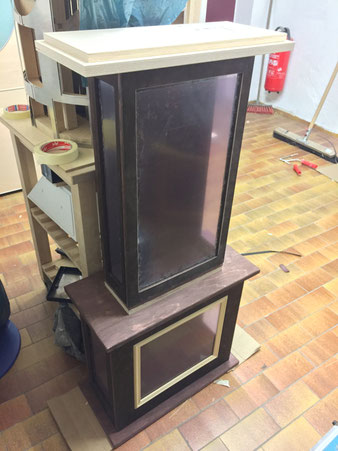
You can see the lower corpus on the left photo. I started with the inner frame which is red. The outer parts got a green finish.
I had to be very precise with painter tape. There was a small part of wood which needed to stay brown. And with glass on the inner side I wanted a clean finish.
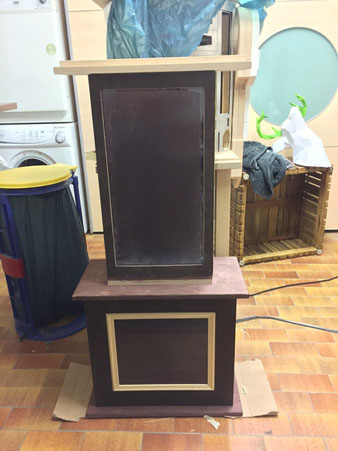
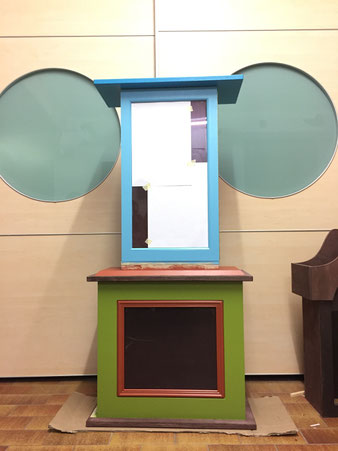
The middle section got color, too. First the door was painted in sky blue. The sides green. The inside was stained dark walnut brown as in the original.
I again used a lot of painters tape to stay save.

I test fitted the pillars at that point to be sure to have all the measurements right. I was happy about the perfect fit.
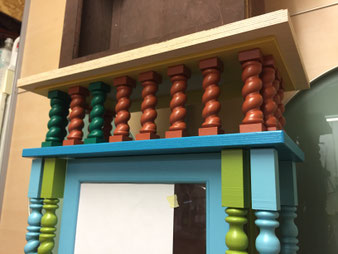
Four of the small pillars are colored dark green which gives a very obscure look to the clock. But it is a great way to get rid of the symmetry to achieve a more realistic feeling.
upper Clock Parts
The upper clock case was the hardest part of the whole build. It has a lot of details, and holds the clockwork and the pendulum drives.
I started as before and constructed the wooden parts. Meanwhile all the pillars were printed and I was thinking about how to design the clockface.

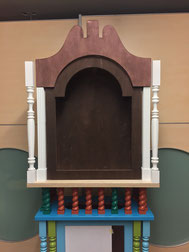
The wooden Frame was kind of tricky, there a a lot of layers with extraordinary shapes. I test fitted everything before.

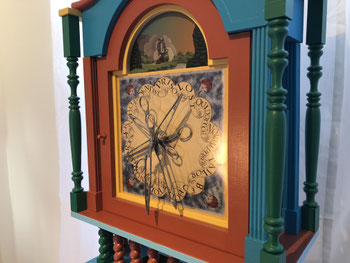
The clock face of the Weasley Clock is very special. As a true Potterhead you know that it doesn't show the time but the locations of all the family members. I did a lot of research online to find a high resolution picture of it but wasn't successful. Luckily I got in contact with a collector who sent me high res photographs of his version of the clockface which once was a collectable item on sale for true fans.
In Photoshop I was able to combine those high res images with the original typeface and some self drawn vectors. The outcome was the best image of the clockface out there in the world wide web.
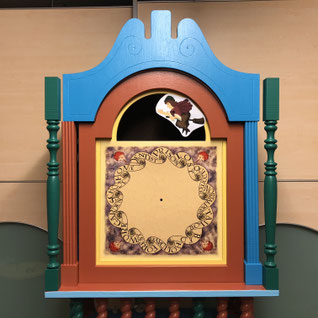
This is the upper clock housing still with the old clockface. But you get an idea how everything comes together with colors and shapes. I also added some wood grindings in the upper blue part.

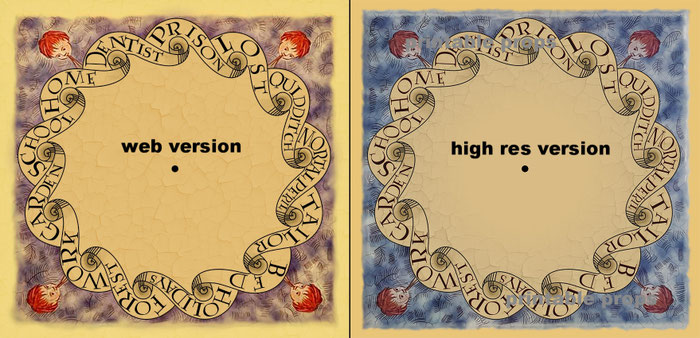
You may have already noticed that there is a small cutout above the clockface which was empty upto now. It will later show a small diorama of the weasley house and its surrounding area. I did my best to create a vector file in Photoshop to show more detail. You can see the difference in the picture to the left.
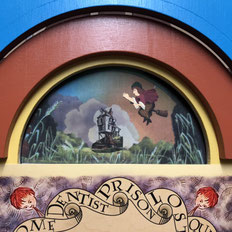
This was a testfit of a picture I found online which later was the guideline for my own high detail version. In the original clock it will have different layers to add more depth to the scene.
I worked on every layer separately including bushes, the house, the clouds and the flying witch.

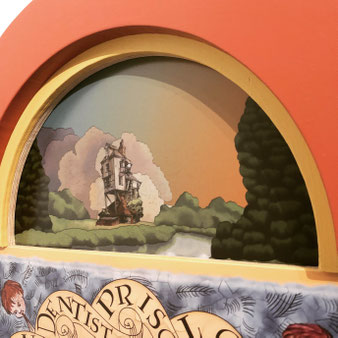
This is the updated version of the diorama. You can see my own interpretation of the bushes and trees. You also may have recognized the different background. I moved in the middle of the project.
adding detail
When the main corpus of the clock was done, I started to focus on the details. There are several parts that are still missing. For example the clock hands, the pendulums and clock counterweights and of course the inner clockwork.

I spent a lot time researching parts for the inner clock which fit the original design as close as possible. I found some of them online at eBay.
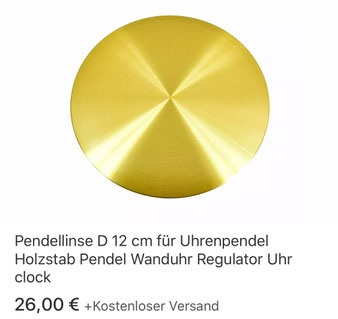
The pendulums lens of the main pendulum needed to have exactly 12 cm in diameter just as in the original.
The pulley on the left was the only one I could find on eBay. Luckily it just had the perfect look.

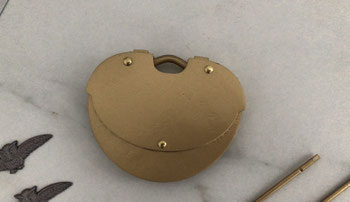
I also used my 3d printer to create the anchor for the second pendulum in the middle section. After sketching the model on my Mac it just took about 1 hour to print the perfect replica.
The whole pendulum has a very interesting shape with additional details like rotating owls.

I thought about creating the owls on my own, too. But I did not find the right modeling software. So I decided to find similar items in the world wide web and found what I was looking for on Etsy. It took a while till they arrived at my door but it was worth the wait.
After priming and sanding the pendulum parts got a fresh paint job with brass spray.
I also added some detail with brass nailheads I found in my toolbox.
A few steps are missing here but I was basically working on the two pendulums for quite a while. I also thought about the integration of working clock drives for them.
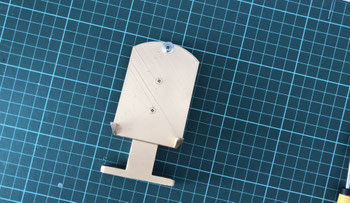
I came up with the idea to add pendulum clock drives from ebay to a frame I printed out with my 3d printer earlier. You can see the frame on the left side. It holds the clock drive very tight and has a adjustable stand for height.
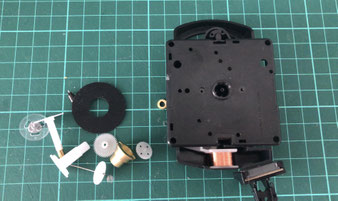
To get rid of the ticking noise I removed all parts of the clock drive I did not need. The only thing left was the pendulum arm.
This is the modified pendulum drive in its frame.
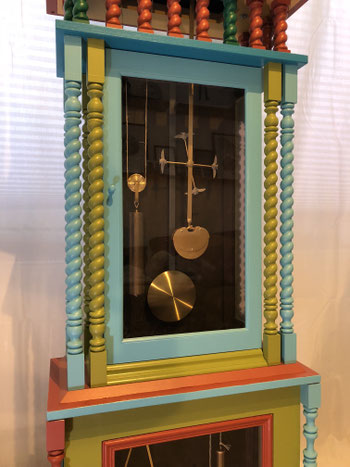
This is the finished middle part with both of the pendulums and the clock weight on the left side. You will see the integration of the pendulum drives in a later post when it comes to the clock faces main mechanism.
The owls got a new silver paint job as in the original and were attached to the pendulums shaft. They are able to rotate freely when the pendulums gets into motion.
The small pulley I found on ebay holds the clock weight. They both hang on a old hemp rope I got from a local one dollar store.
Some pictures of the process are still missing here and will be added soon.
Final Shots of the finished Weasley Clock